General Setup

Indira
Last Update a year ago
Welcome to the ShipX app, a single solution for customizing your shipping rates.
Let's start to set up your ShipX app.
Navigate to the settings section in the app.
The app appears to be in testing mode, so until you subscribe, your customers won't be able to view the rates. You can see the rates only if the Carrier Calculated Shipping API is enabled. (This is a feature required in test mode also).

Note: You can use the app for development in testing mode for which you wouldn't be charged. However, you will continue to be charged if you subscribe and subsequently switch to testing mode.
Check the video below to see how the app is used in test mode.
General Settings
- You can see the currency and time zone of your store here. This cannot be changed as it depends on the country you have chosen while creating your store.
- By default, the metrics are filled here. You can change them if required based on your preference.
- Now, choose how you would like to see your shipping rates at the checkout page from the "Multiple rates at checkout" dropdown. By default, "Show only the highest rate" is selected.

Click here to see how the multiple rates at checkout works.
Sync options
This section can be used to sync the shipping zones and the products.
To enable the above settings, ensure that the zones and products are synced once.
Important: Make sure to resync each time you add a new product tag or shipping zone.

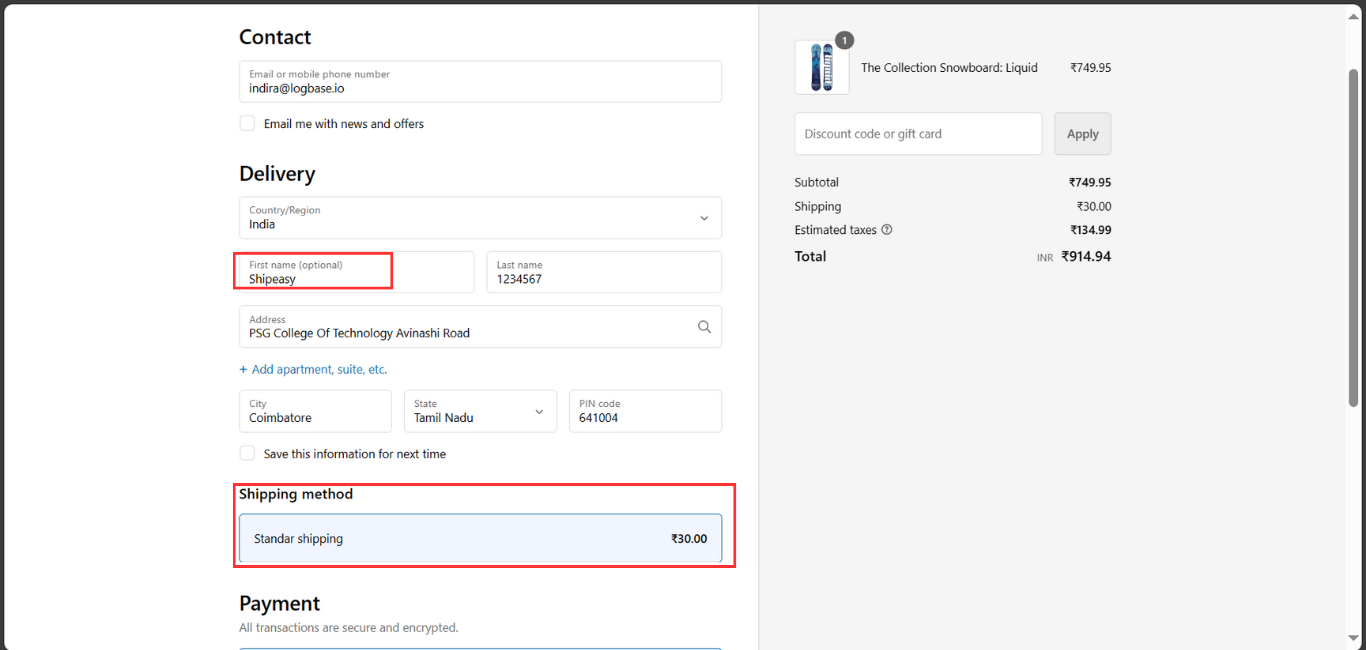
When in testing mode, use Shipx as your first name on the checkout page to view your shipping rates.
Do not worry if you find the settings complicated, we are here to help you.
You may contact us at [email protected] or schedule a call from here.